
Are you looking for a course builder to create your first web-based online course in WordPress? There are tons of free WordPress LMS(Learning management system) plugins to build online courses. But unlike other plugins, Dozent LMS is an enterprise LMS system that helps you build online courses on the go with its frontend course builder. If you want employee retention through e-learning or you just want to make money building your online course, then Dozent LMS WordPress Plugin is the right choice for you.
In this guide, I’ll walk you through every step on how to create your first online course using Dozent LMS WordPress Plugin. Using the frontend course builder you’ll see how easy it is to set up a course in less than 30 minutes.
Before installing the plugin
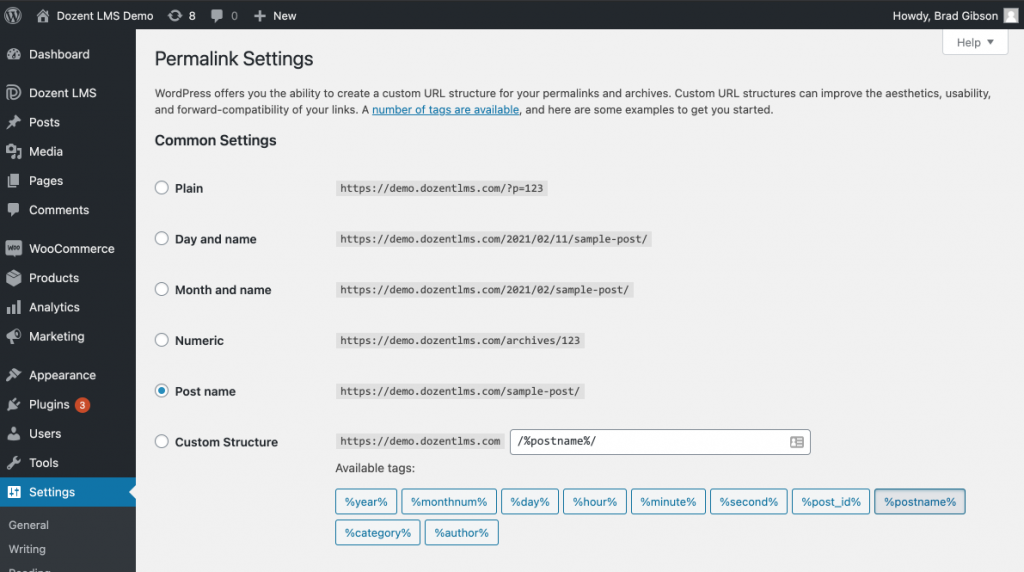
Before you start using this plugin, it is important to configure the permalinks in your WordPress website. Permalink is the whole URL name for a particular page or content on your website.
Default permalinks aren’t a good choice when you want users to find your online course easily.
Go to your Dashboard>setting>Permalinks. Then choose Post name as permalink setting for your website. It is very crucial to do it before installing DozentLMS as it generates dynamic links constantly.
Step 1: Install the plugin
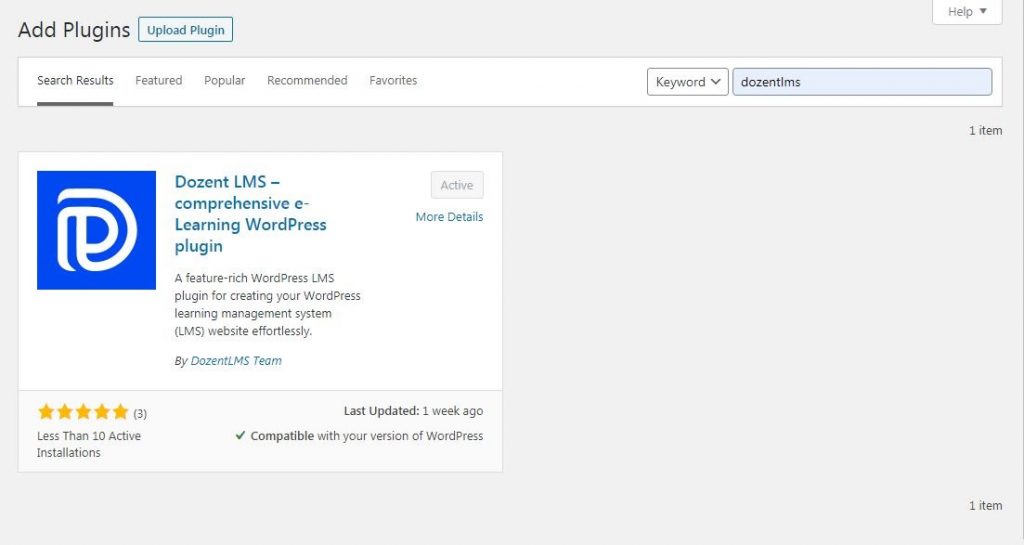
Go to Add new plugin section in your dashboard, and search DozentLMS. DozentLMS is a free WordPress plugin. Activate the plugin right away after installing the plugin. Then you will see the DozentLMS plugin in the dashboard.
Step 2:Configure the plugin settings
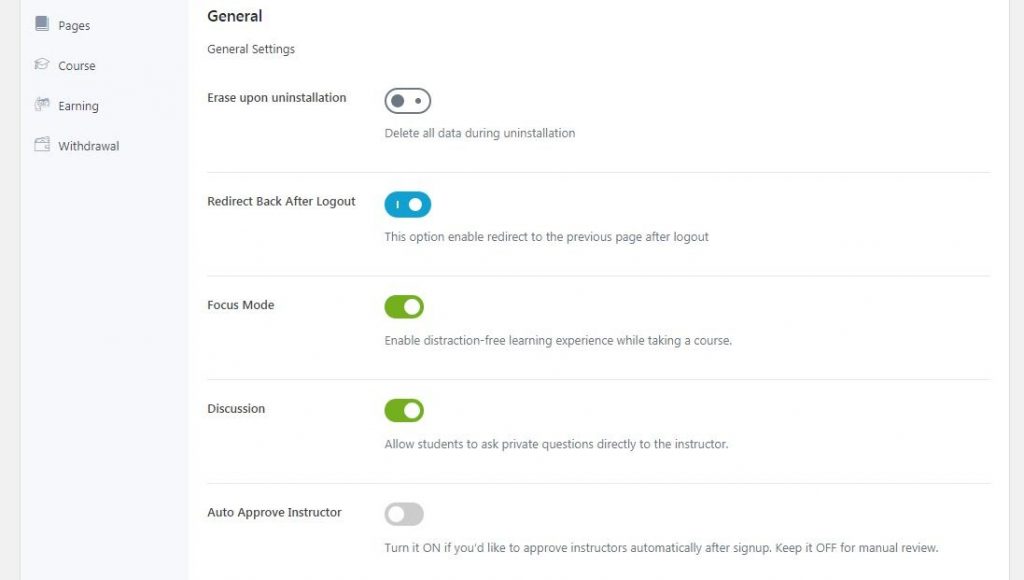
General setting:
First, go to DozentLMS>Settings>General. Here you can change the overall LMS according to your course needs. We recommend enabling Focus Mode and Discussion functionalities to increase user engagement with the course.
Also, don’t forget to enable the Redirect Back After Logout option. Enabling this option will take the user back to the home page when they log out from the system.
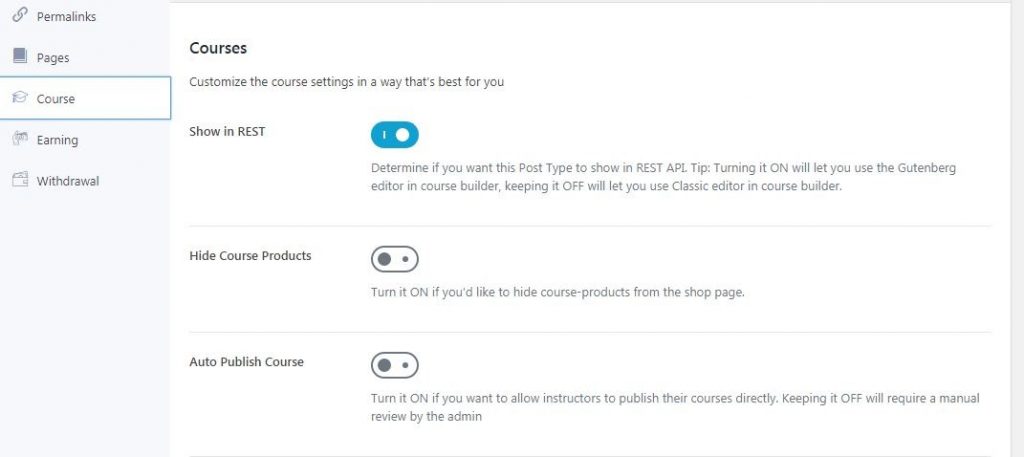
Course setting:
Next, go to Settings>Courses Section. We highly recommend turning on the REST API function. This will make the course building process very easy with the help of the Gutenberg editor.
If you want to skip the hassle of manually publishing courses by different course instructors, you can enable the Auto Publish Course, though we suggest not to do so.
Step 3: Start building the course platform
Now we’re ready to build our first online course using DozentLMS plugin. To get started click on the DozentLMS>All Courses
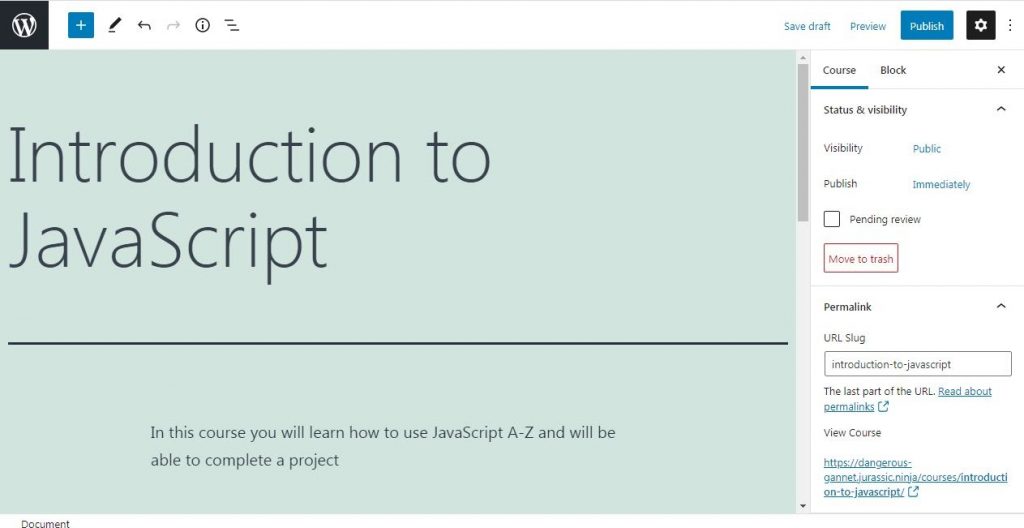
Add a title to the course:
To add a title to your new course, click Add New. It will open up a new interface with the Gutenberg editor. Now give a meaningful title for the course. Under the title, you can also write a few sentences describing your course.
Change the general settings of your course:
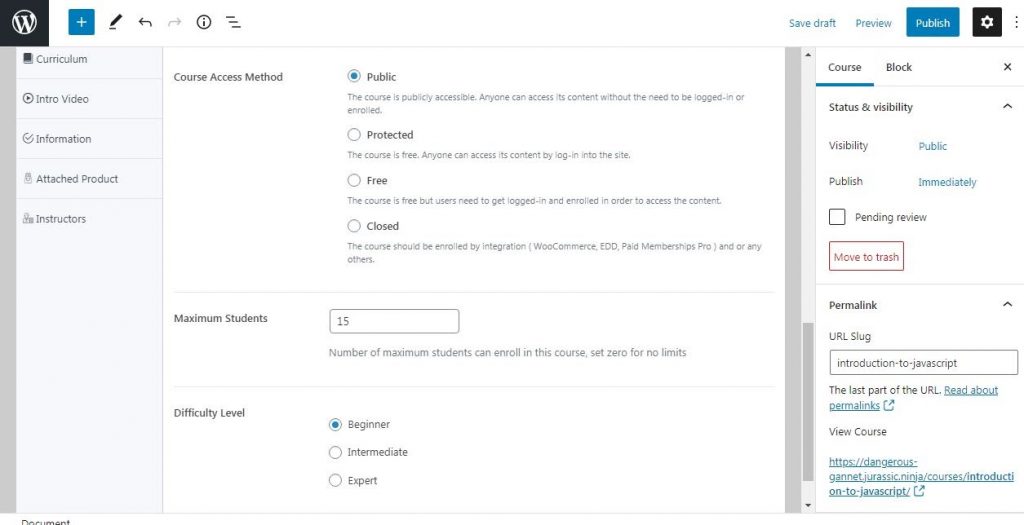
A little down to the left side of the page. You’ll see a list of menus for course customization. Click General.
Choose options according to the type of courses you want to build. If you want users to access it without logging into the website, then choose the Public option. Though we highly recommend keeping your course Closed or Protected.
You can also choose the maximum number of users enrolling in the course and the course difficulty level.
Give necessary information to the course:
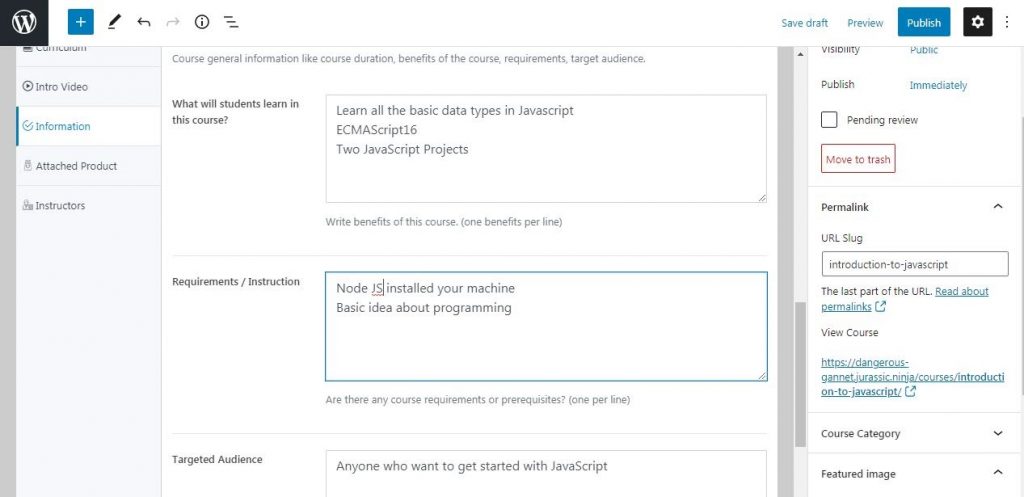
Go to Information from the menu. Now put the necessary information like course requirements, course benefits and target audience, etc into the boxes.
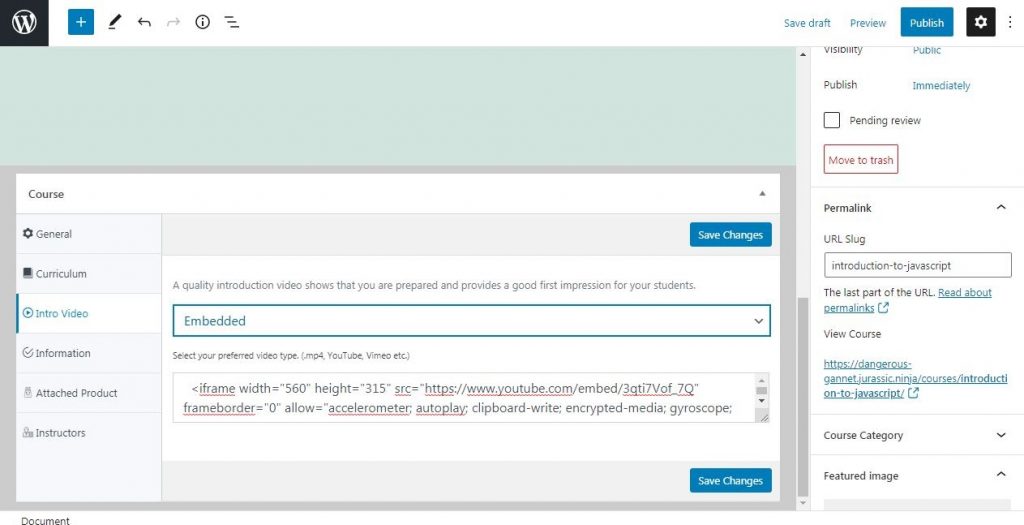
Include an amazing teaser course video:
DozentLMS lets you insert intro videos for your course. Whatever video you choose, make sure it is a high-quality video. To do this go to the Intro Video section.
Here you can choose the video type such as embedded video, video content from a website or just uploading mp4 from your pc.
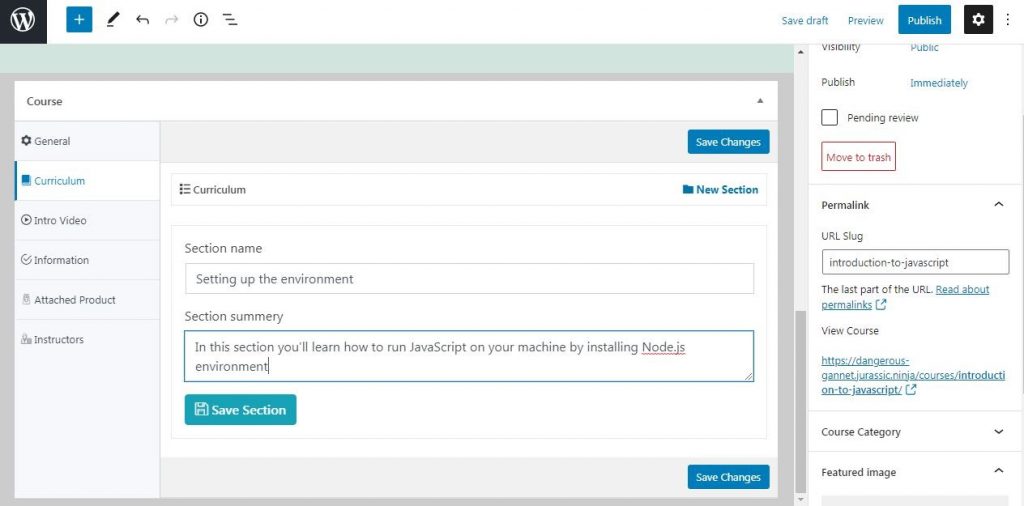
Creating the course curriculum:
Go to Curriculum. Here you can create the whole course curriculum divided into separate units. Under each unit, you can add lectures and quizzes.
Click on the Add Section. There are two boxes, where you have put a name for the unit and the summary for this unit. Doing this will make it easy for the learner to understand what each unit will cover.
Add a new lecture for a unit:
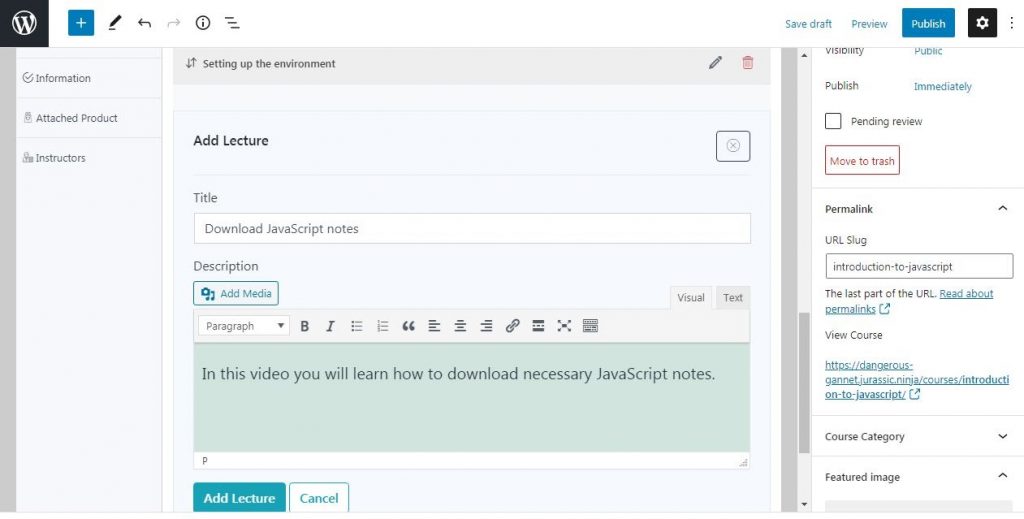
A lecture can contain video or pdf, or both. Click on the Lecture icon. Give a meaningful title and description of what this particular lecture is about. Now click on Add Lecture. choose Video/Attachment to insert video lecture or pdf.
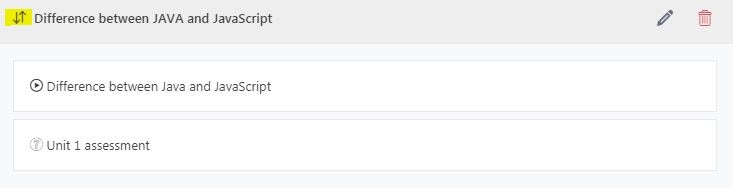
Arrange course curriculum using Drag and Drop feature:
By using the DozentLMS course builder, you can drag and drop lectures and units in any order you want. To drag the sections, click on the upside-down icon on the left side.
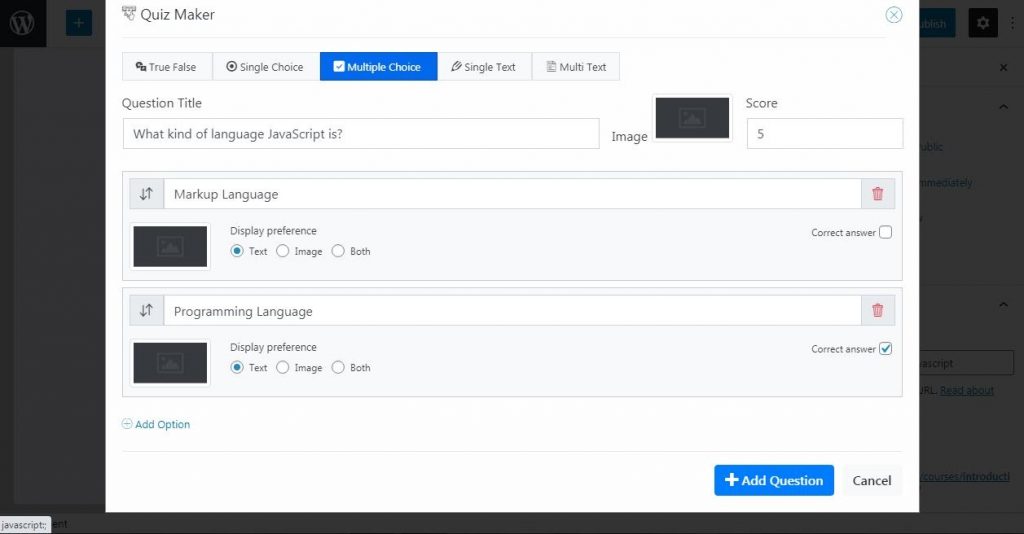
Add Quiz using Quiz Maker:
DozentLMS can help to create interactive quizzes to increase engagement with the course.
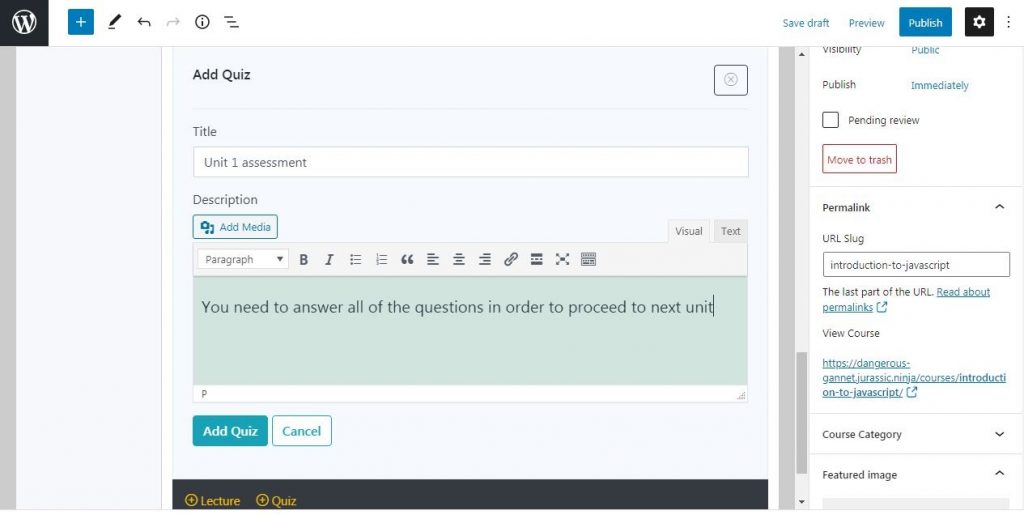
First, choose the unit where you want to add the quizzes. Click the Quiz icon.
After giving your quiz section a meaningful name and description click the Add Quiz and then click on the Add Question button.
You will get a new pop-up window to add one quiz question. First, choose the type of quiz you want to add. Such as True/False, Single choice, Multiple Choice, etc.
Put the quiz Question Title and a score for the quiz. You can also provide an image in your quiz question.
Now add the answer options for the quiz. Give a title for each answer and choose how each option will be displayed. You can choose both image and text form.
Finally, Click on Add question to save the quizzes on the course curriculum.
You can also customize Quiz settings for each unit by going to Quiz>Settings.
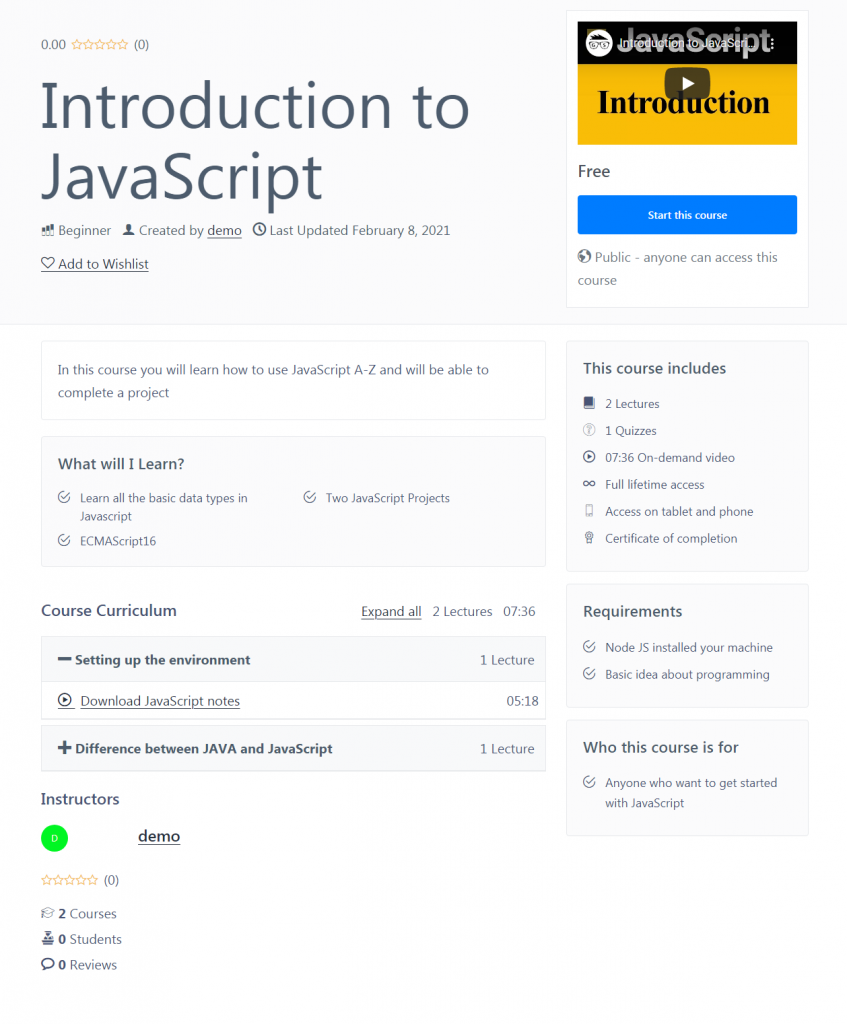
After you’re done with creating the basic structure for your new course, hit publish. The course page will finally look like this:
Wrapping Up
In this guide, we covered how to make a simple course using the DozentLMS WordPress plugin. Using this plugin you can add an instructor, configure the earning system for your courses and integrate your courses to different eCommerce websites. To know more go to our Documentation of the plugin.